Setting Up Hadoop on a Raspberry Pi Cluster
At $35 dollars each, the Raspberry Pi has made it possible to study distributed computing on the cheap. So for approximately $200 I was able to pick up 4 Raspberry Pi units, 4 microSD cards, an ethernet switch, and enough power & ethernet cables to set up a tiny 4-node cluster.
I had been curious about Apache’s Hadoop framework so decided that it would be the first application I’d install on the cluster. In this post, I’ll describe the process of installing and running Hadoop on a single node then do the same for a multi-node cluster in a future post.
Setting up the Raspberry Pi
The first step is to download and install an operating system. Raspbian, the official OS for the Pi, is available in two flavors, Raspbian with Pixel and Raspbian Lite. Raspbian with Pixel is similar to the operating systems we’re all familiar with; a desktop interface with point and click controls. Raspbian Lite, however, lacks a desktop environment completely and boots directly into the command line interface. As a result, Raspbian Lite occupies less disk space and consumes less resources than Raspbian with Pixel. Since my pi’s will be headless, I decided to install Raspbian Lite.
Installing the OS onto a microSD card requires an image writing tool. On Linux and MacOS, the dd terminal command works perfectly fine. Windows users will have to download a separate program (such as Win32DiskImager) to accomplish this task. More information on installing the OS can be found here.
With the OS installed, the next step is to configure the pi. First, login with the default credentials:
username: pi
password: raspberry
Then access the Software Configuration tool by executing the following command:
sudo raspi-config
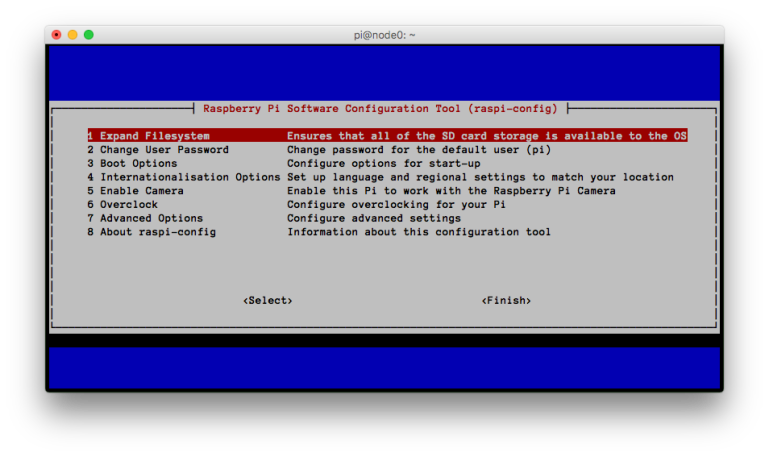
The raspi-config tool provides access to the most commonly changed configuration options.
And make the following changes:
- Expand the Filesystem: Newer releases of Raspbian will automatically perform this operation but it can be invoked manually.
- Change User Password: Change the current password to something more secure.
- Advanced Options → Hostname: Since I’m setting up the first node in the cluster, I’ve set this value to node1.
- Advanced Options → Memory Split: Since my pi will be headless, I’ve changed the GPU memory to 8 MB.
- Advanced Options → SSH: Enable
Exit the Configuration Tool by selecting Finish. The machine may reboot. Once we’re back at the CLI we’ll configure the network.
Create a static IP
To make it easier for our nodes to communicate with each other, we’ll assign each one it’s own IP address. To do so, type sudo vi /etc/dhcpcd.conf and paste the following into the bottom of that file:
interface eth0
static ip_address=192.168.1.101
static routers=192.168.1.1
static domain_name_servers=192.168.1.1
This will assign our first node an IP address of 192.168.1.101. We’ll follow this convention so that our second node will be 192.168.1.102, the third 192.168.1.103, etc.
Install Java
According to the Hadoop documentation, “Version 2.7 and later of Apache Hadoop requires Java 7.” Installing Java from the command line is simple but first we should update our repository package lists and upgrade any out-of-date packages with the following commands:
sudo apt-get update

sudo apt-get upgrade
Then install Java 7:
sudo apt-get install oracle-java7-jdk
To verify that Java was installed correctly, executing the command java -version should produce the following output:
java version “1.7.0_60”
Java(TM) SE Runtime Environment (build 1.7.0_60-b19)
Java HotSpot(TM) Client VM (build 24.60-b09, mixed mode)
Create a Dedicated Hadoop Environment
Creating a dedicated Hadoop user and group separates the Hadoop installation from other services on the machine.
We’ll first create a “hadoop” group with the following command:
sudo addgroup hadoop
Then add a user to that group:
sudo adduser --ingroup hadoop hduser
Finally, grant this user root privileges:
sudo adduser hduser sudo
Create and Setup SSH Certificates
From this point on, we’ll be working in our newly created Hadoop environment so switch to the hduser account:
su hduser
And generate a SSH authentication key:
ssh-keygen -t rsa -P "" # It is okay to accept the default filename
Add the newly created key to the list of authorized keys so Hadoop can SSH to the localhost without prompting for a password:
cat /home/hduser/.ssh/id_rsa.pub >> /home/hduser/.ssh/authorized_keys
OR
ssh-copy-id localhost
Verify that the key was added by attempting to SSH to the localhost:
ssh localhost
Once connected to the localhost, you can disconnect by typing exit.
Install Hadoop
Navigate to the Apache Hadoop Releases page and download the binary Tarball. You can then transfer the file to the pi with scp or download it directly from the pi with the wget command. After the file has downloaded, verify its integrity by calculating and comparing its checksum to that provided by Apache. If the two values match, then extract the files by executing:
tar xvf name-of-hadoop-tarball.tar.gz
We’ll use the mv command to move the Hadoop files from the current working directory (likely the home directory) to the /usr/local directory:
sudo mv hadoop-2.7.3 /usr/local/ # The name of your folder may be different depending on the version of Hadoop you downloaded.
The next two steps are optional but help in maintaining and updating Hadoop.
- In /usr/local/ create a softlink to the hadoop-2.7.3 folder:
sudo ln -s /usr/local/hadoop-2.7.3 /usr/local/hadoop - Copy the Hadoop configuration folder to /usr/local:
sudo cp -r /usr/local/hadoop-2.7.3/etc/hadoop/ /usr/local/hadoop-config
Now, should we decide to use a different version of Hadoop, all that needs to be done is to update the softlink to point to the new version. Since the configuration files are not stored with the old version, we remove those files without having to reconfigure the system.
Update Environment Variables
Hadoop has a set of environment variables that need to be added to the system but before we get to that, we’ll have to determine the location of your Java installation. This is easily obtained by executing this command:
readlink -f /usr/bin/javac | sed "s:/bin/javac::"
On my system, it produces the following:
/usr/lib/jvm/jdk-7-oracle-arm-vfp-hflt
Copy this location as we’ll need in the next step.
Now, open up your .bashrc file and add the following:
# Java environment variable
export JAVA_HOME=”/usr/lib/jvm/jdk-7-oracle-arm-vfp-hflt”
# HADOOP environment variables
export HADOOP_PREFIX=”/usr/local/hadoop” # Path to Hadoop
export HADOOP_HOME=$HADOOP_PREFIX
export HADOOP_COMMON_HOME=$HADOOP_PREFIX
export HADOOP_CONF_DIR=$HADOOP_PREFIX/hadoop-config # Our config folder
export HADOOP_HDFS_HOME=$HADOOP_PREFIX
export HADOOP_MAPRED_HOME=$HADOOP_PREFIX
export HADOOP_YARN_HOME=$HADOOP_PREFIX
# Update PATH environment variable:
export PATH=”$HADOOP_PREFIX/bin:$HADOOP_PREFIX/sbin:$PATH”
Reload the .bashrc file so the new environment variables are visible to the current shell:
source ~/.bashrc
Verify Hadoop Installation
At this point, we’re pretty much done! We can check that Hadoop has been installed correctly simply by checking the version:
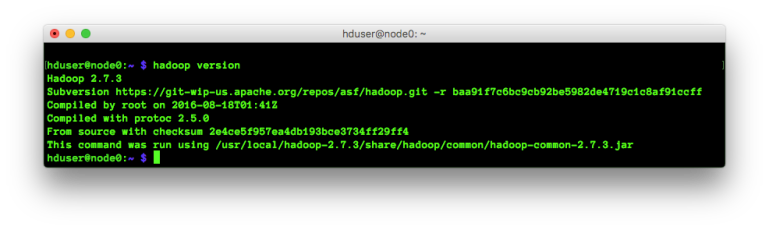
Verifying that the installation was successful.
WordCount in Non-Distributed Mode
By default, Hadoop is configured to run in non-distributed mode, as a single Java process. Therefore, we can actually run a MapReduce job from our single node. Executing the following command will run the WordCount program on the LICENSE.txt file and write its results to the output directory:
hadoop jar /usr/local/hadoop/share/hadoop/mapreduce/hadoop-mapreduce-examples-2.7.3.jar wordcount /usr/local/hadoop/LICENSE.txt ~/output
The results of the WordCount application can be viewed by executing:
cat ~/output/part-r-00000
That’s it. We now have a single node running Hadoop in non-distributed mode.
